Automatic Litter Box – Modular Print Prep + Prototype Enhancements
Prepared the automatic litter box enclosure for 3D printing by slicing it into modular, printable parts. Designed alignment tabs and connectors to ensure clean assembly, structural stability, and easy iteration before printing and physical assembly.
🐾
In this iteration I did two main things:
- Prepared the enclosure for 3D printing by slicing it into separate parts (so every section fits the printer, prints cleanly, and can be assembled like a kit).
- Continued enhancing the prototype, improving geometry, fitment, and overall stability.
This post focuses on the design work behind that process.
🧩 Part 1 — Slicing the Design Into Printable Pieces (Print Preparation)
The enclosure is too large/complex to print as one single piece, so I broke it down into modular sections:
- side panels
- curved corners
- top/bottom segments
- internal ribs/plates
- connectors/locks (the “tabs” that make everything align and snap together)
Wireframe / part layout planning
This stage is about planning where the split lines go and making sure every part can be printed without ugly supports.
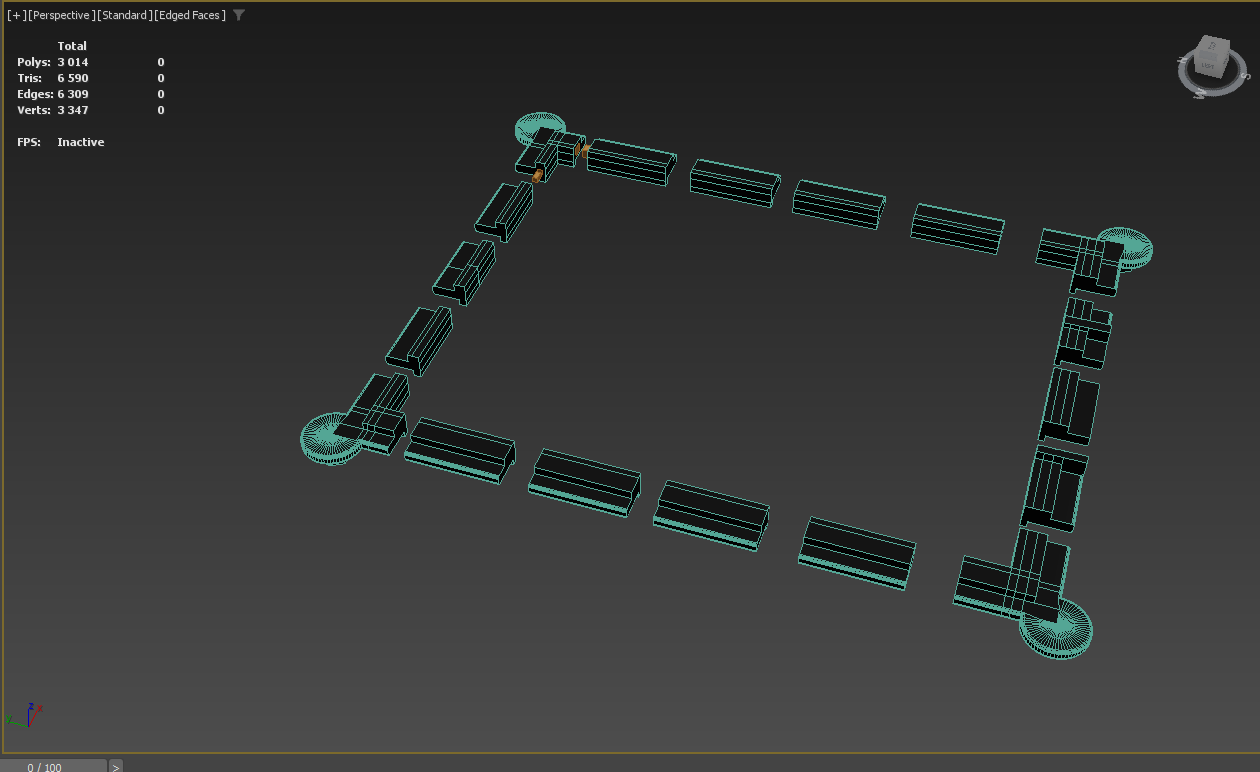
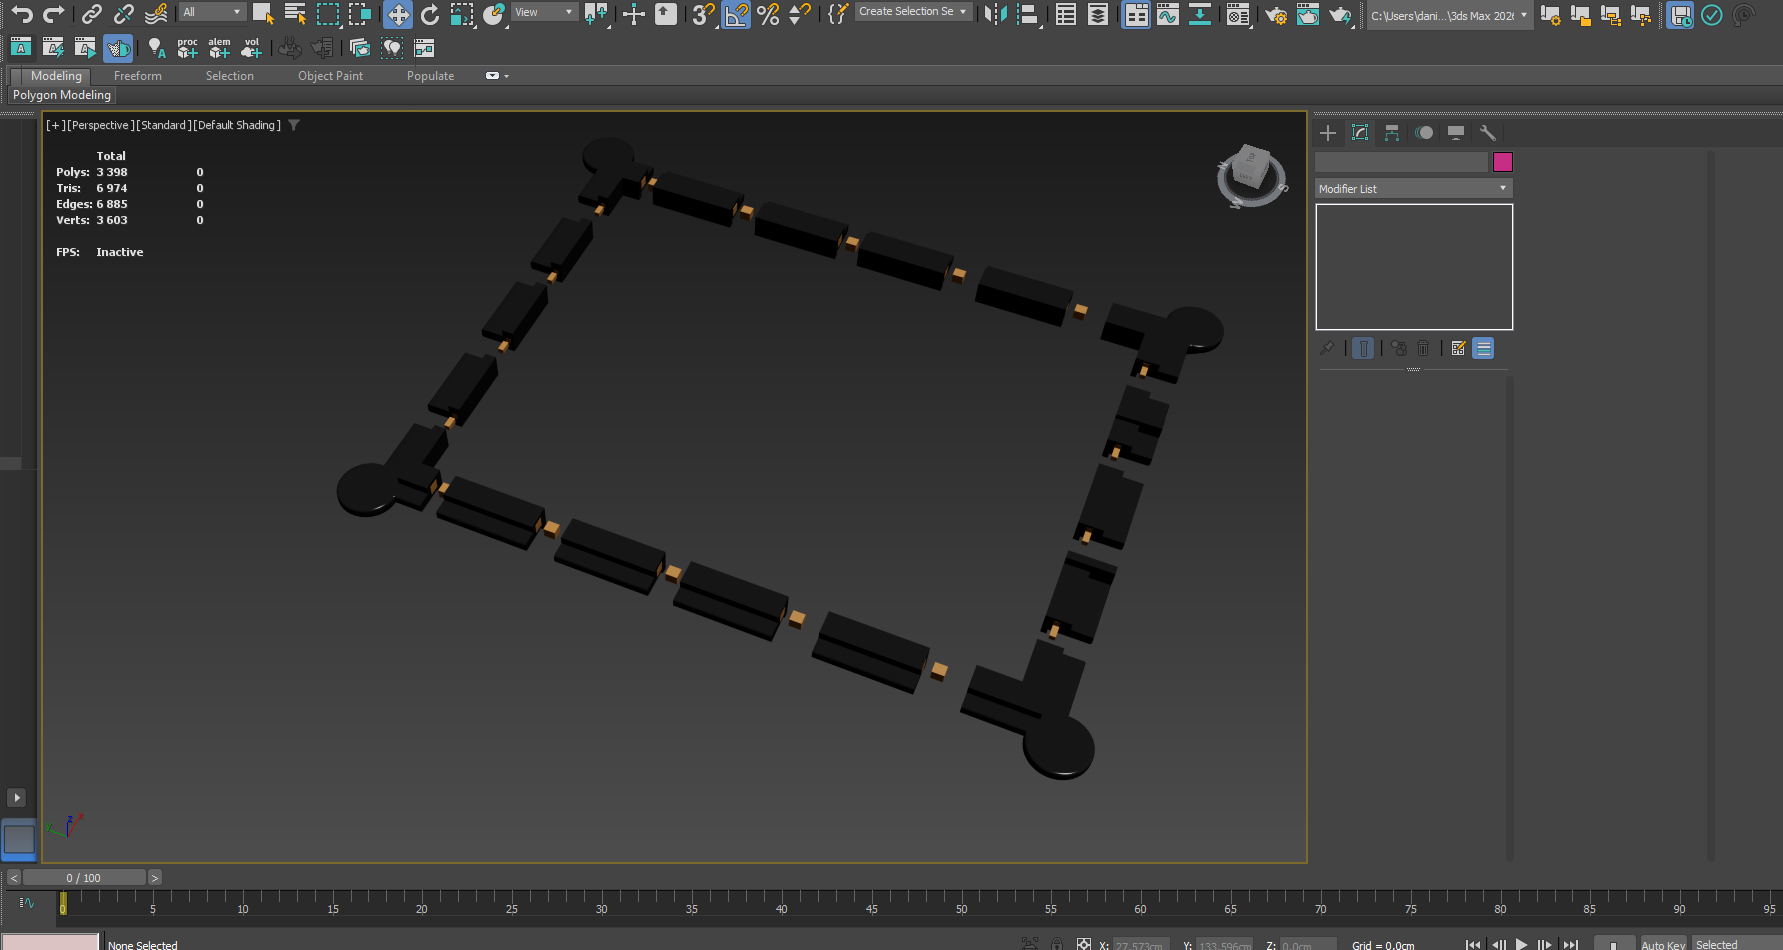
Shaded layout — verifying pieces + alignment
Here I’m checking that each part is correctly separated and that the connectors line up around the full perimeter.
🧱 Part 2 — Connector System (Tabs / Locks / Alignment Guides)
Once the model is split, the next problem is:
How do you make 20+ printed parts assemble cleanly and hold shape?
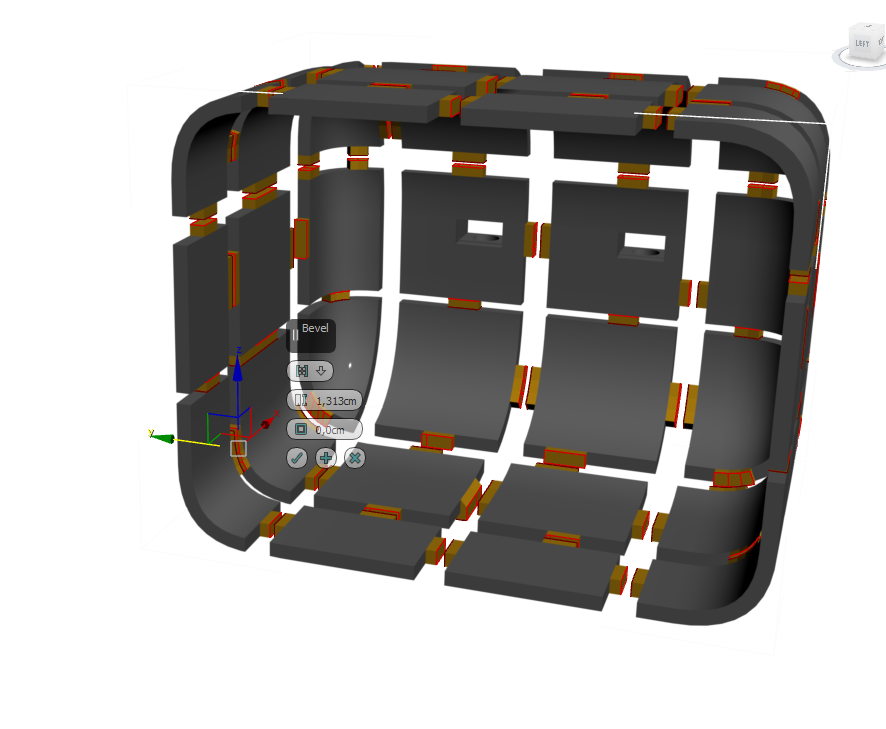
That’s what these images show:
- small connector blocks
- alignment tabs
- consistent spacing so everything sits square
- reinforced corners so it doesn’t flex
Internal grid + connectors visible (print kit view)
This looks like an exploded “construction set” view — showing how every piece will lock into the frame.
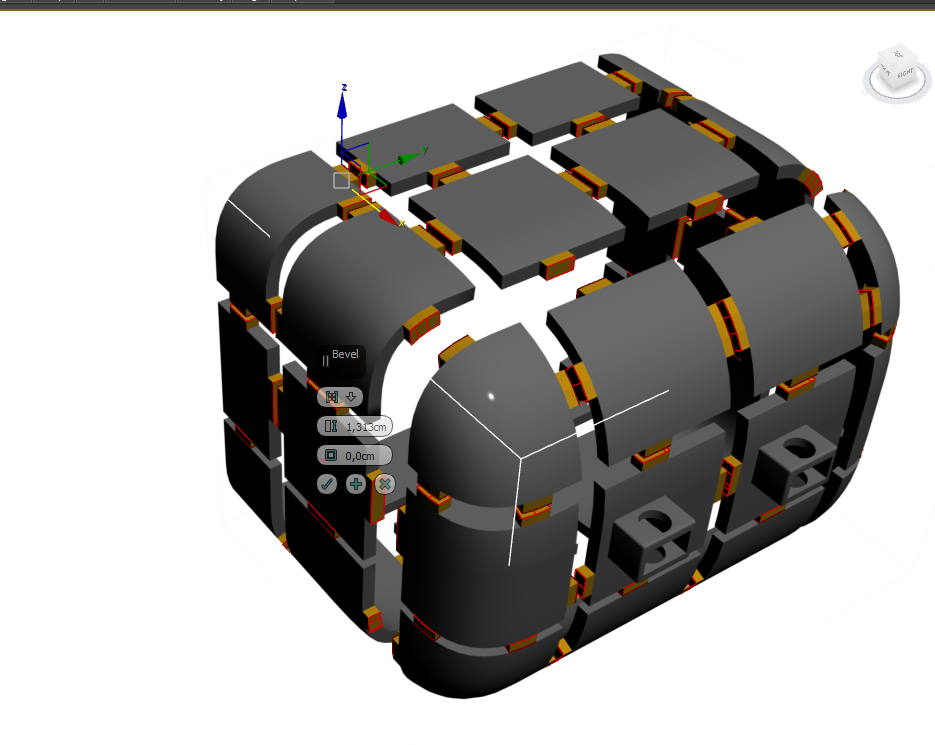
Exterior shell pieces + connector placement
This angle makes it clearer how the curved outer shell is built up from multiple segments.
Cross-section style view (checking fit + assembly order)
This is basically a “how will it assemble in real life?” view — making sure nothing clashes and the parts can be installed in a practical order.
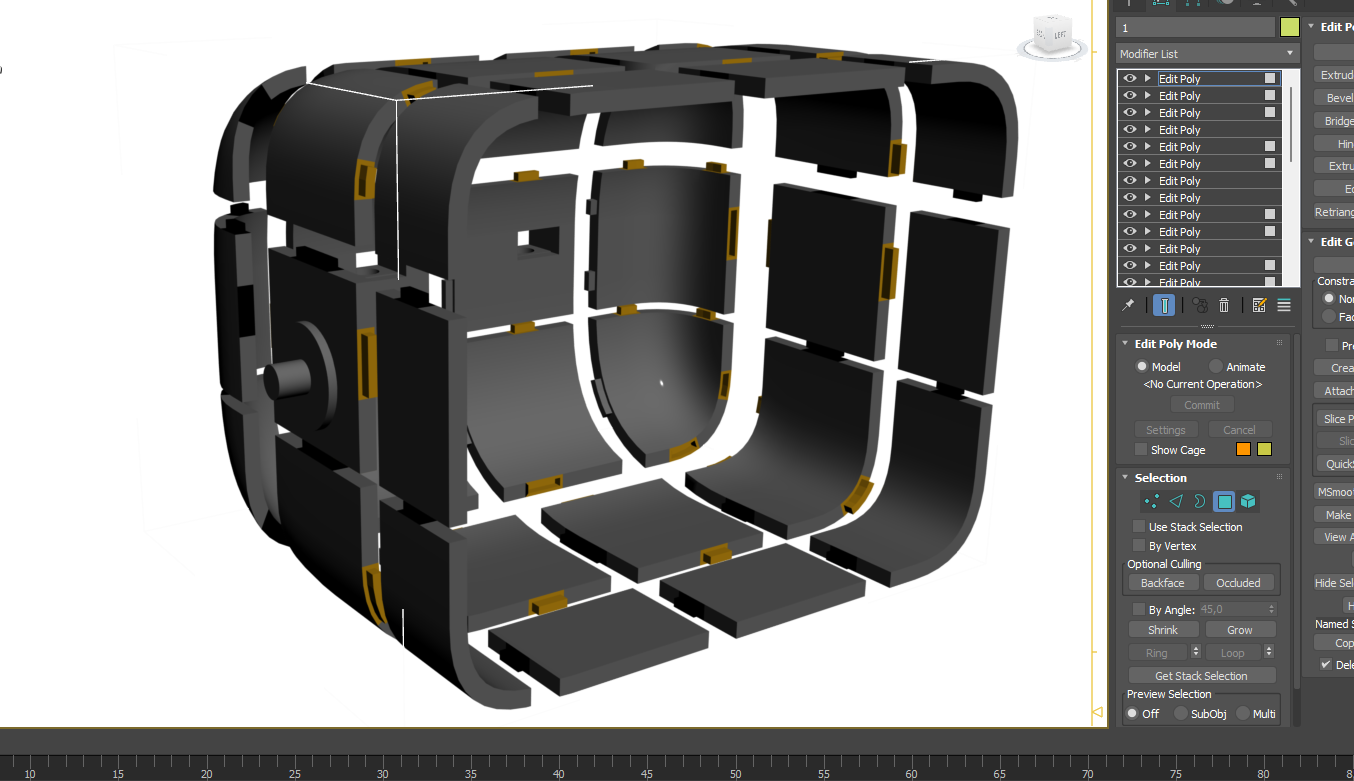
Clean exploded shell view (final print-prep check)
This is the final sanity check: everything is separated, connectors are consistent, and the print set looks “complete”.
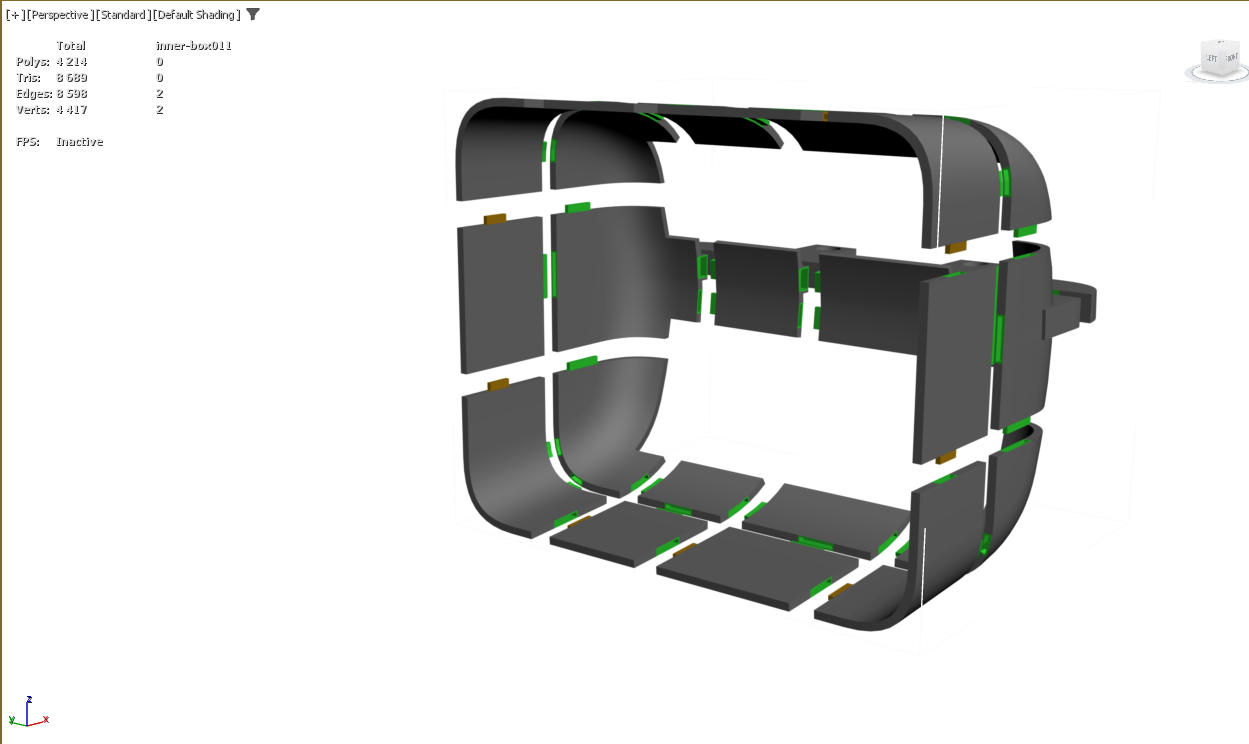
🚀 What This Enables Next
By slicing the enclosure like this, I get a bunch of benefits:
- Each part fits the printer bed properly
- Less support material and cleaner surfaces
- Broken parts are easy to reprint (instead of reprinting the whole enclosure)
- I can iterate on one section at a time (corners, top shell, motor mount area, etc.)
- Assembly becomes repeatable and modular (like a real product)
Now that the print-prep design work is in a good place, the next step is printing and assembling the full shell and continuing the prototype improvements around:
- motor mount + gearing
- safety/limit switches
- cat detection sensors
- noise reduction
Comments
Comments
Loading comments…