Automatic Litter Box – The Inner Box Is Finally Printed and Assembled
The full inner box is finally printed and assembled. I tested plastic welding combined with super glue, but the finished prototype revealed a new problem: the roof is too low, so the upper section now needs a rethink.
The inner box is finally starting to look like an actual part of the litter box instead of a collection of separate prints.
I have now printed the complete inner structure and assembled all the individual pieces into one box.
Because the parts are much larger than what I can print as a single piece, the whole thing had to be split into several sections. That also meant I needed a way of joining the prints strongly enough that they behave more like one large part once everything is assembled.
This time I tried something new.
Instead of relying only on glue, I combined super glue with plastic welding, melting the printed sections together along the joints.
It is definitely not the prettiest part of the build so far, but structurally it feels like a much better solution.

🖨️ Printing Something This Large in Multiple Pieces
The inner box is simply too large to print as one piece.
So I divided the walls, floor and upper sections into smaller printable parts and then assembled them afterwards.
That works, but it creates another problem:
every split in the model becomes a physical joint.
With a small decorative print that might not matter much.
For this project it matters a lot.
The inner box will eventually have cat litter moving around inside it, and the entire structure needs to stay rigid while being handled and rotated.
I did not want the separate sections to depend entirely on a thin layer of glue between two flat printed surfaces.

🔥 Melting the Printed Parts Together
So I tried a different way of joining the pieces.
I first aligned the printed sections and used super glue to hold everything in position.
After that I melted the plastic together along the seams.
The idea is basically to turn the joint itself back into one piece of plastic instead of having two completely separate printed surfaces touching each other.
You can clearly see the welded seams in the pictures.
They are rough.
Very rough.
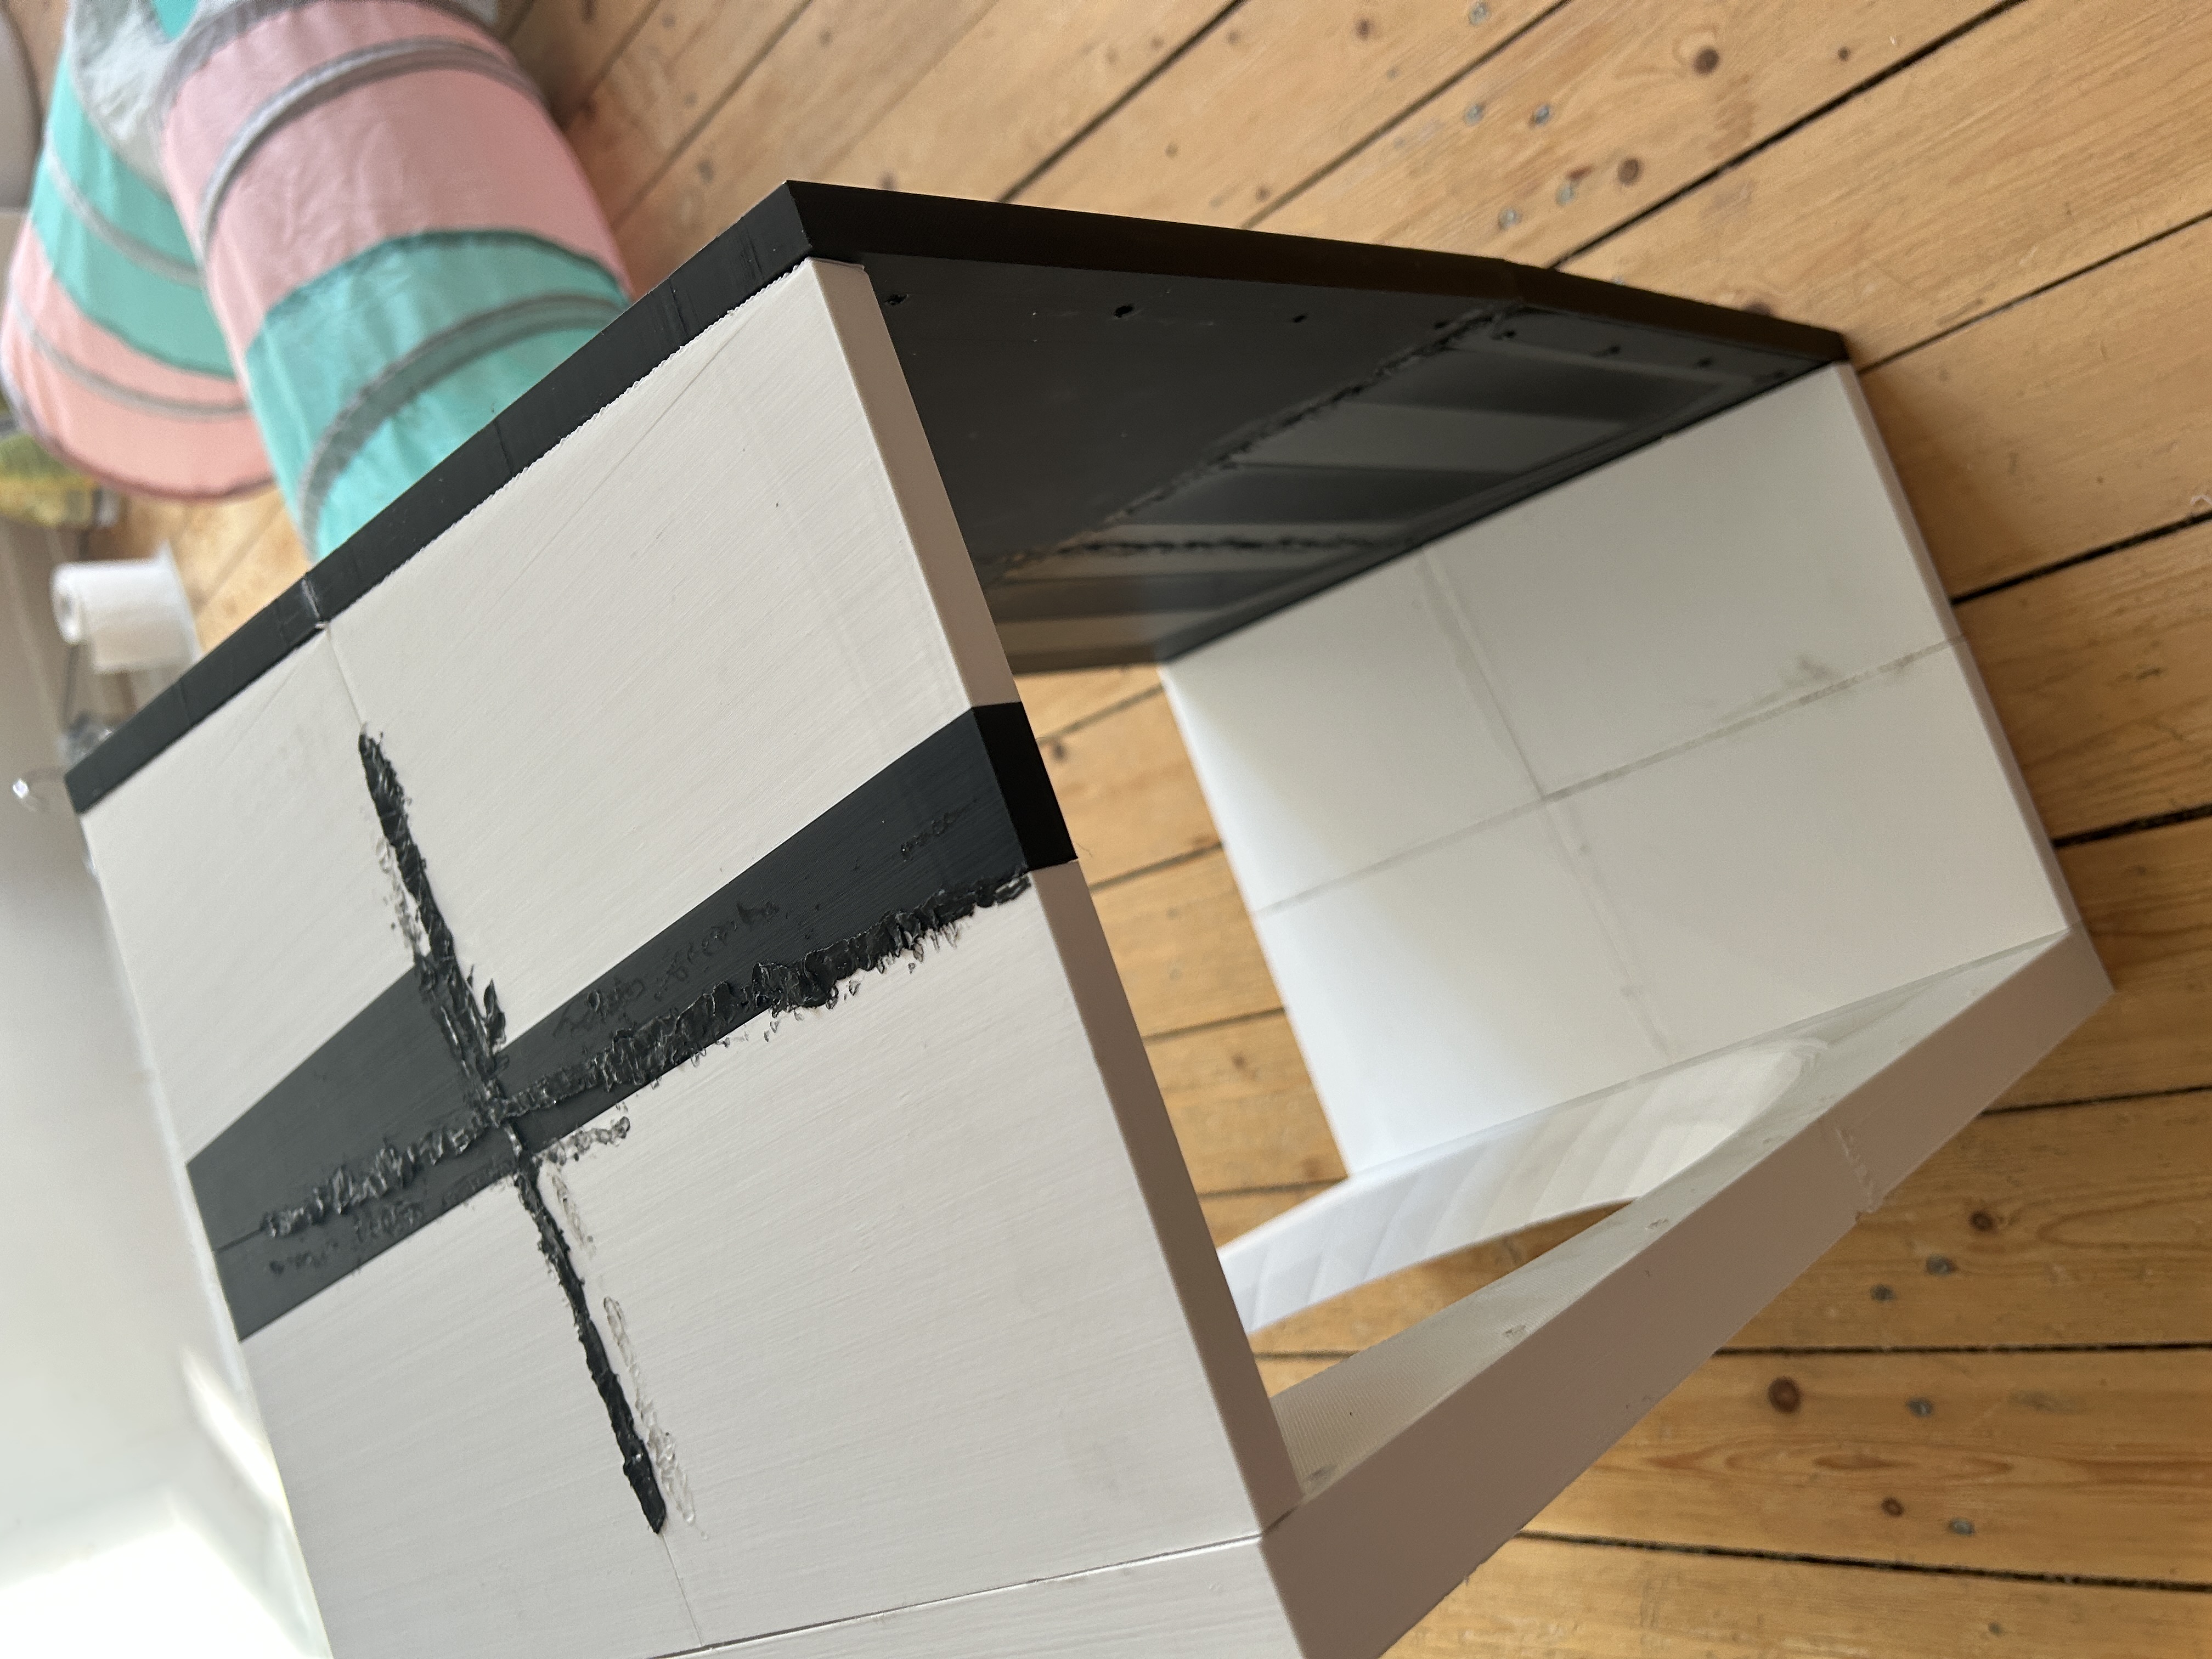
But at this stage I honestly do not care much about that.
This is still a prototype and I am much more interested in whether the structure holds together than whether every seam looks perfect.
Once the plastic around the joint melts together, the connection feels completely different compared with simply gluing the parts edge-to-edge.
The super glue helps keep everything aligned while I work, and the melted plastic gives the joint more material connecting both sides.
For something this large, that combination makes a lot more sense to me.
🧩 The Inner Box Is Now One Complete Structure
Once all the sections were joined, I could finally see the complete inner box at its actual size.
That was useful because some things are very difficult to judge while everything is still separate inside 3ds Max.
On the screen I know the dimensions.
I can measure everything.
I can move parts around and inspect the model from any angle.
But having the complete object physically in front of me is different.
The opening is there.
The walls are there.
The floor is there.
And for the first time I can properly look at the amount of space a cat will actually have inside it.
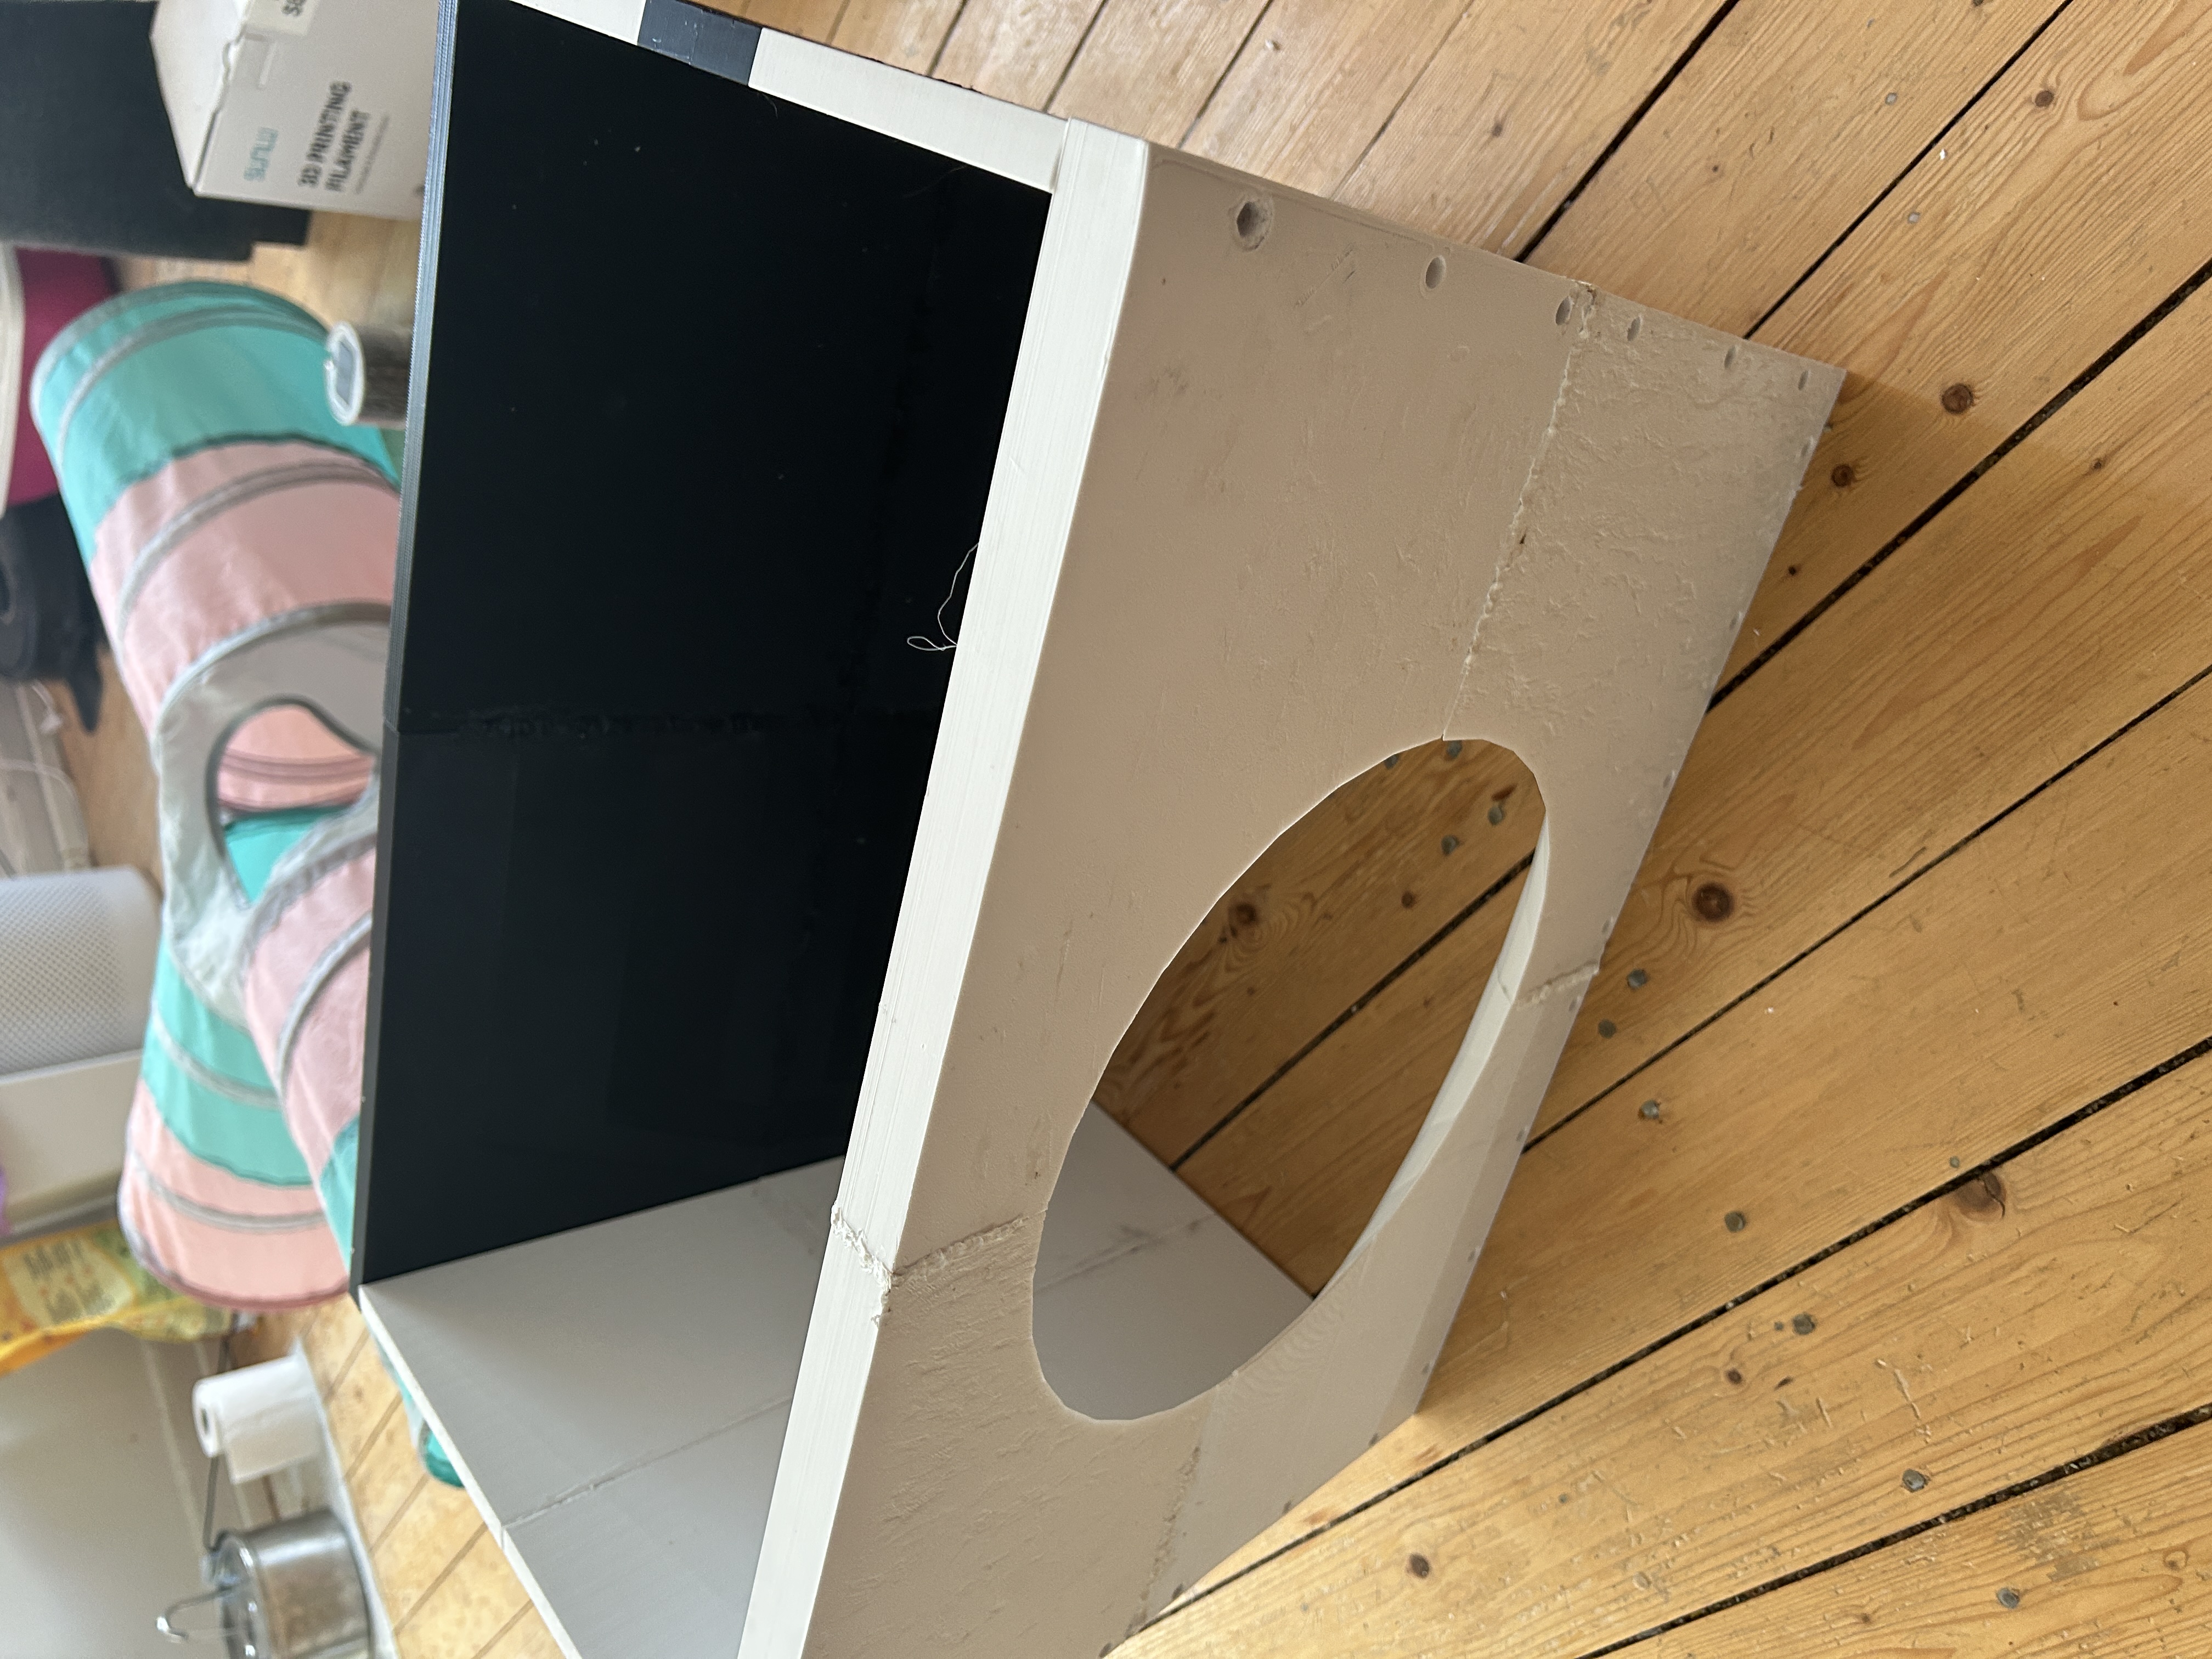
That immediately exposed a problem.
📏 The Top Is Too Low
Now that the complete inner box is assembled, one thing is obvious:
the top of the box is too low.
This was much harder to appreciate when I was only looking at individual dimensions and separate pieces.
The opening itself is large enough, but once I look at the complete internal volume, there simply is not enough height.
A cat needs to be able to enter the box and actually stand normally while doing its business.
I do not want the finished machine to technically have enough room for a cat to fit inside while forcing it to crouch because I made the roof too low.
That would completely miss the point.
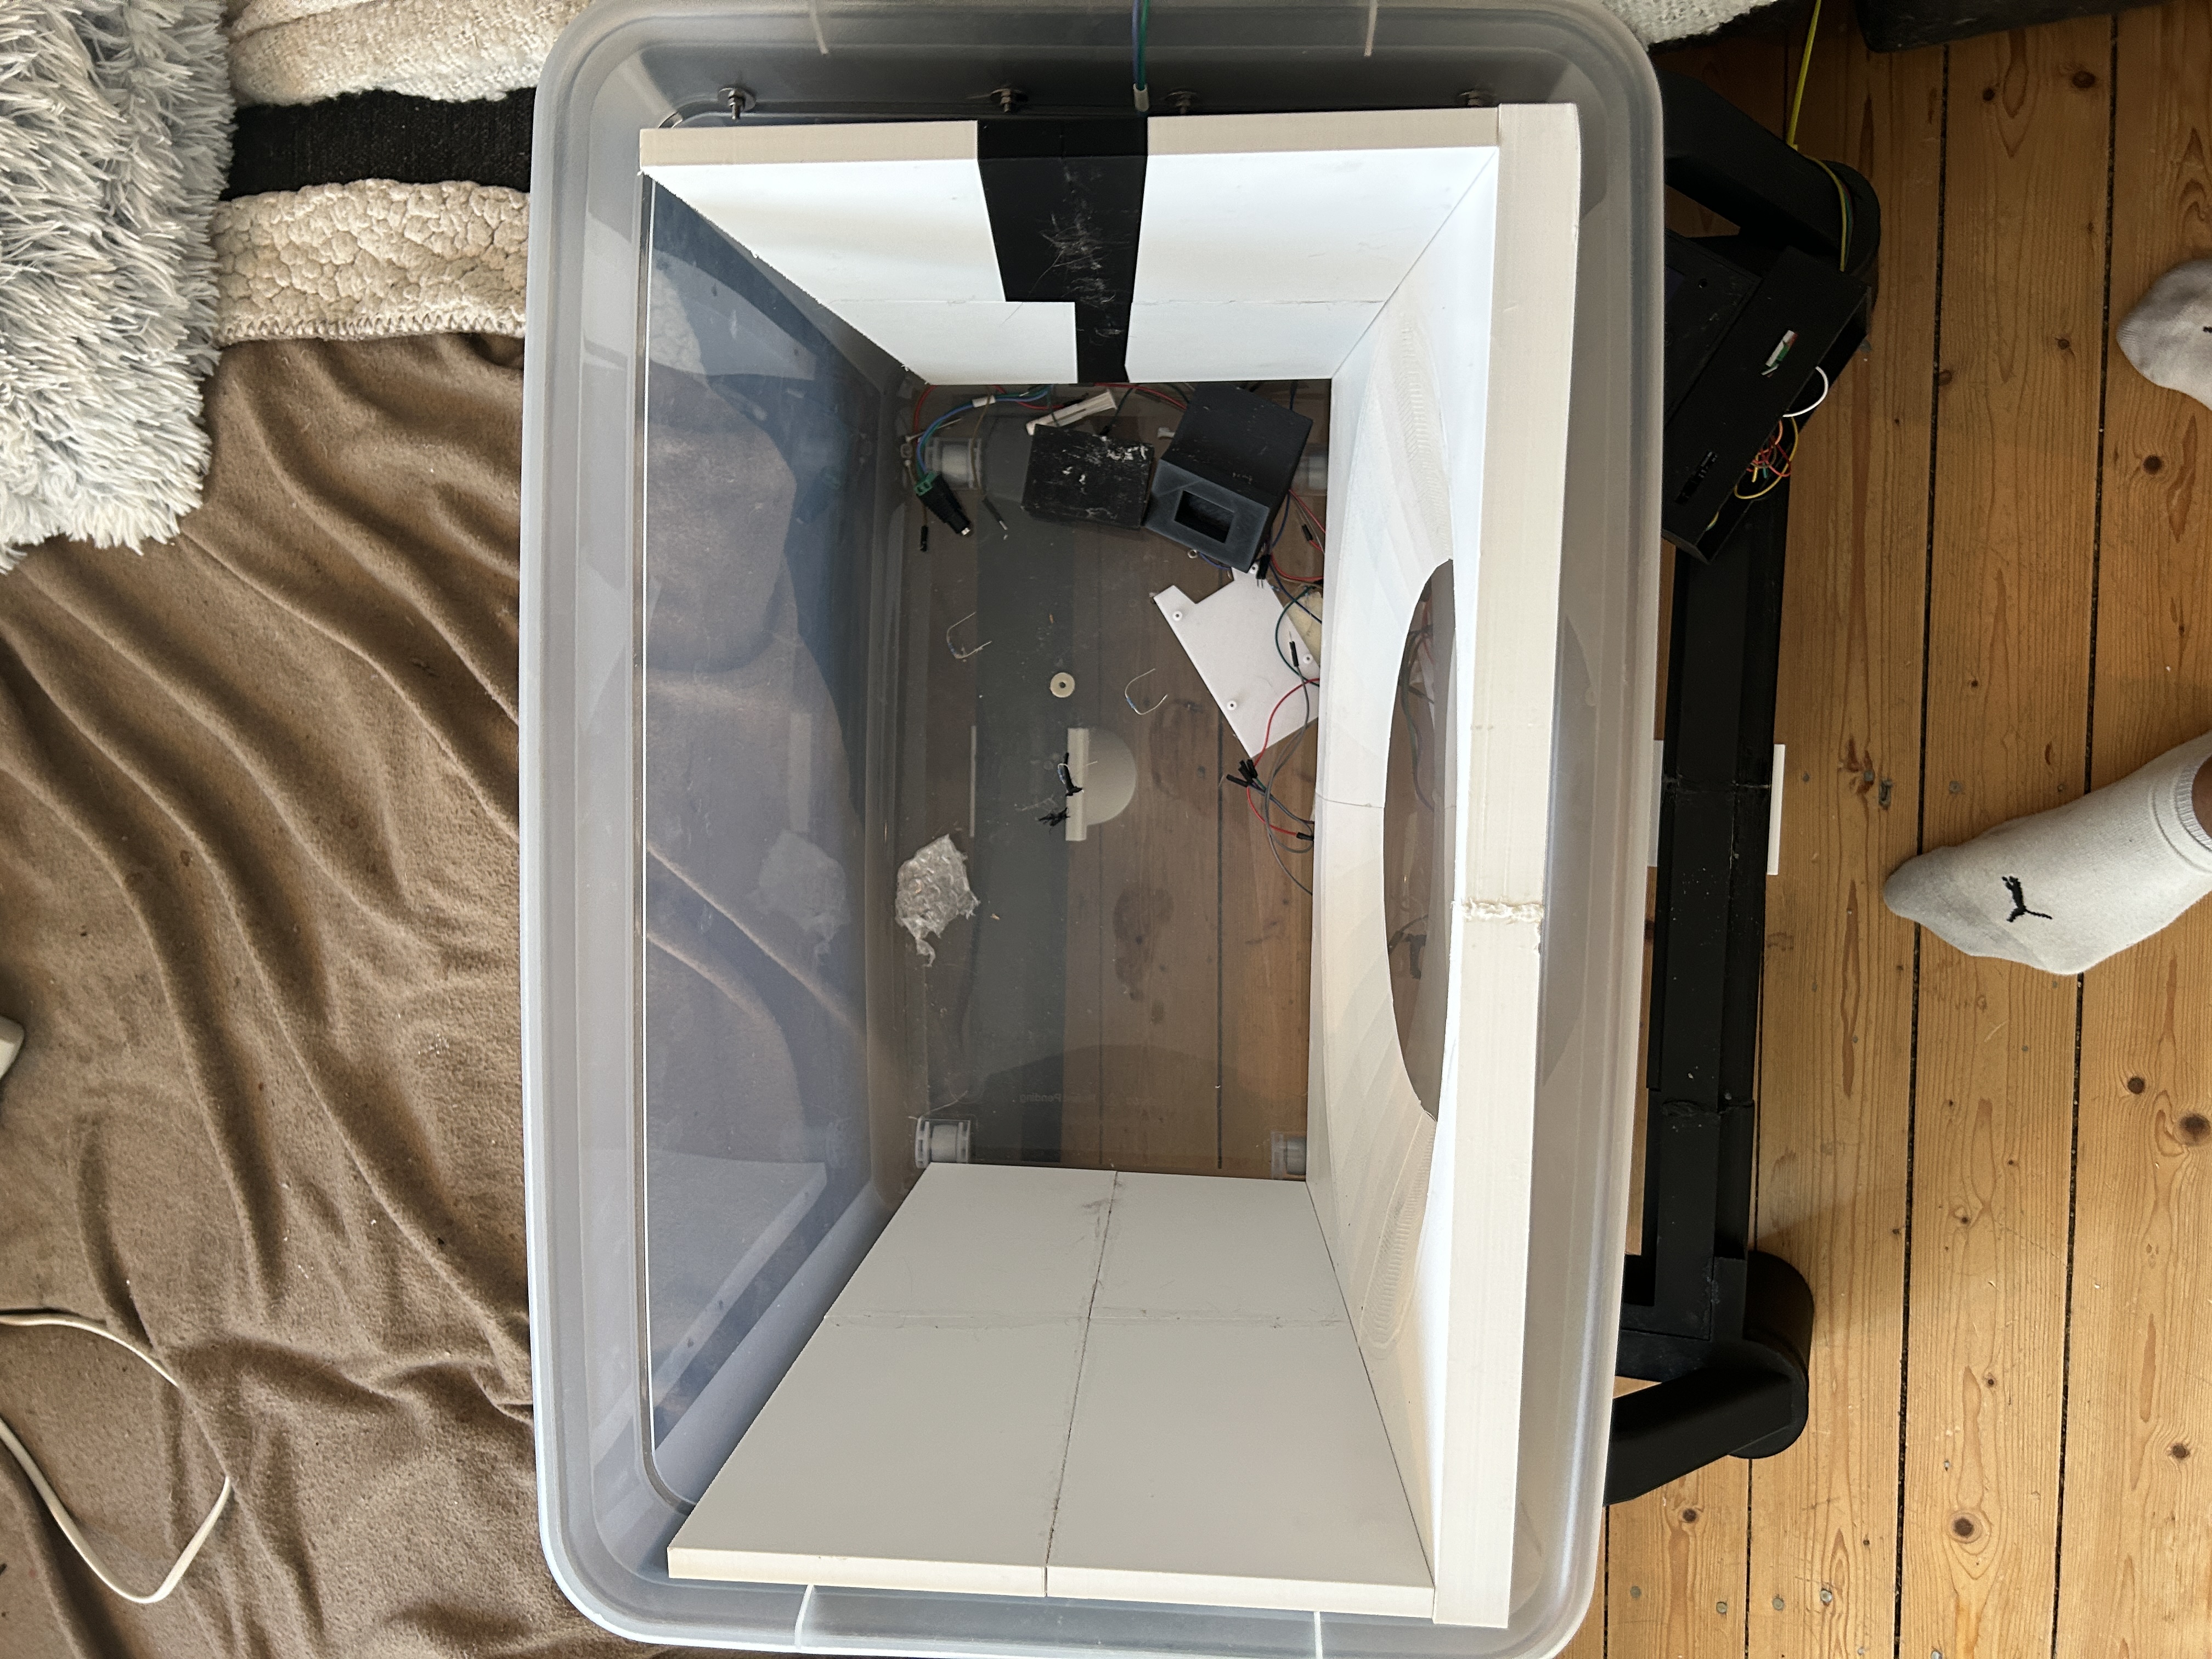 The top-down view makes the problem much easier to understand.
The footprint itself is actually quite good.
There is a decent amount of floor space inside the box.
The problem is vertical space.
So I do not necessarily need to redesign the entire inner box.
I need to solve the roof.
🐈 Designing Around the Cat Instead of the Machine
This is one of those moments where building the physical prototype matters much more than staring at measurements.
Mechanically, I can make something fit.
That does not automatically mean it is comfortable for a cat.
The cat does not care that the dimensions work perfectly in my 3D model.
It needs enough space to:
- Walk inside.
- Turn around.
- Stand normally.
- Dig in the litter.
- Use the box without having the roof directly above its back.
That means the internal volume has to be designed around the animal, not just around the mechanism surrounding it.
It sounds obvious when I write it down.
But it became much more obvious when I finally put the complete inner box together.
🏠 A Flat Roof Probably Does Not Make Sense Anymore
The current upper section is basically flat.
That was convenient when I designed and printed the individual pieces, but now I am questioning whether a flat roof is the correct shape at all.
I have two possible ways of solving the height problem.
Option 1 – Make One Side of the Original Box Higher
One possibility is to modify the original outer box itself.
I could increase the height along one of the long sides and create more vertical space above the inner box.
That would give me additional room without changing the lower section I have already printed.
The downside is that I would have to modify the larger surrounding structure.
Option 2 – Add a Dome-Shaped Roof
The other idea is much more interesting.
Instead of keeping the top flat, I could create a dome-shaped upper section.
Something roughly like this:
A dome would give the cats extra height where they actually need it without making the entire box unnecessarily taller.
I could design the dome as a separate printed part and screw it onto the structure.
That would also mean I do not necessarily have to throw away the inner box I have already spent all this time printing and joining together.
🔩 I May Be Able to Keep the Box I Already Printed
That is probably the most important thing I am thinking about right now.
The inner box itself is not necessarily wrong.
The walls fit.
The floor works.
The front opening is there.
Everything is now assembled into a solid structure.
The problem is mainly the upper space.
So instead of starting over, I may be able to modify what I already have.
One possibility is to remove or leave out the current flat upper section and build a new dome-shaped top that sits above it.
The dome could then be screwed into the existing printed structure.
That would give me significantly more headroom while letting me keep most of the work I have already done.
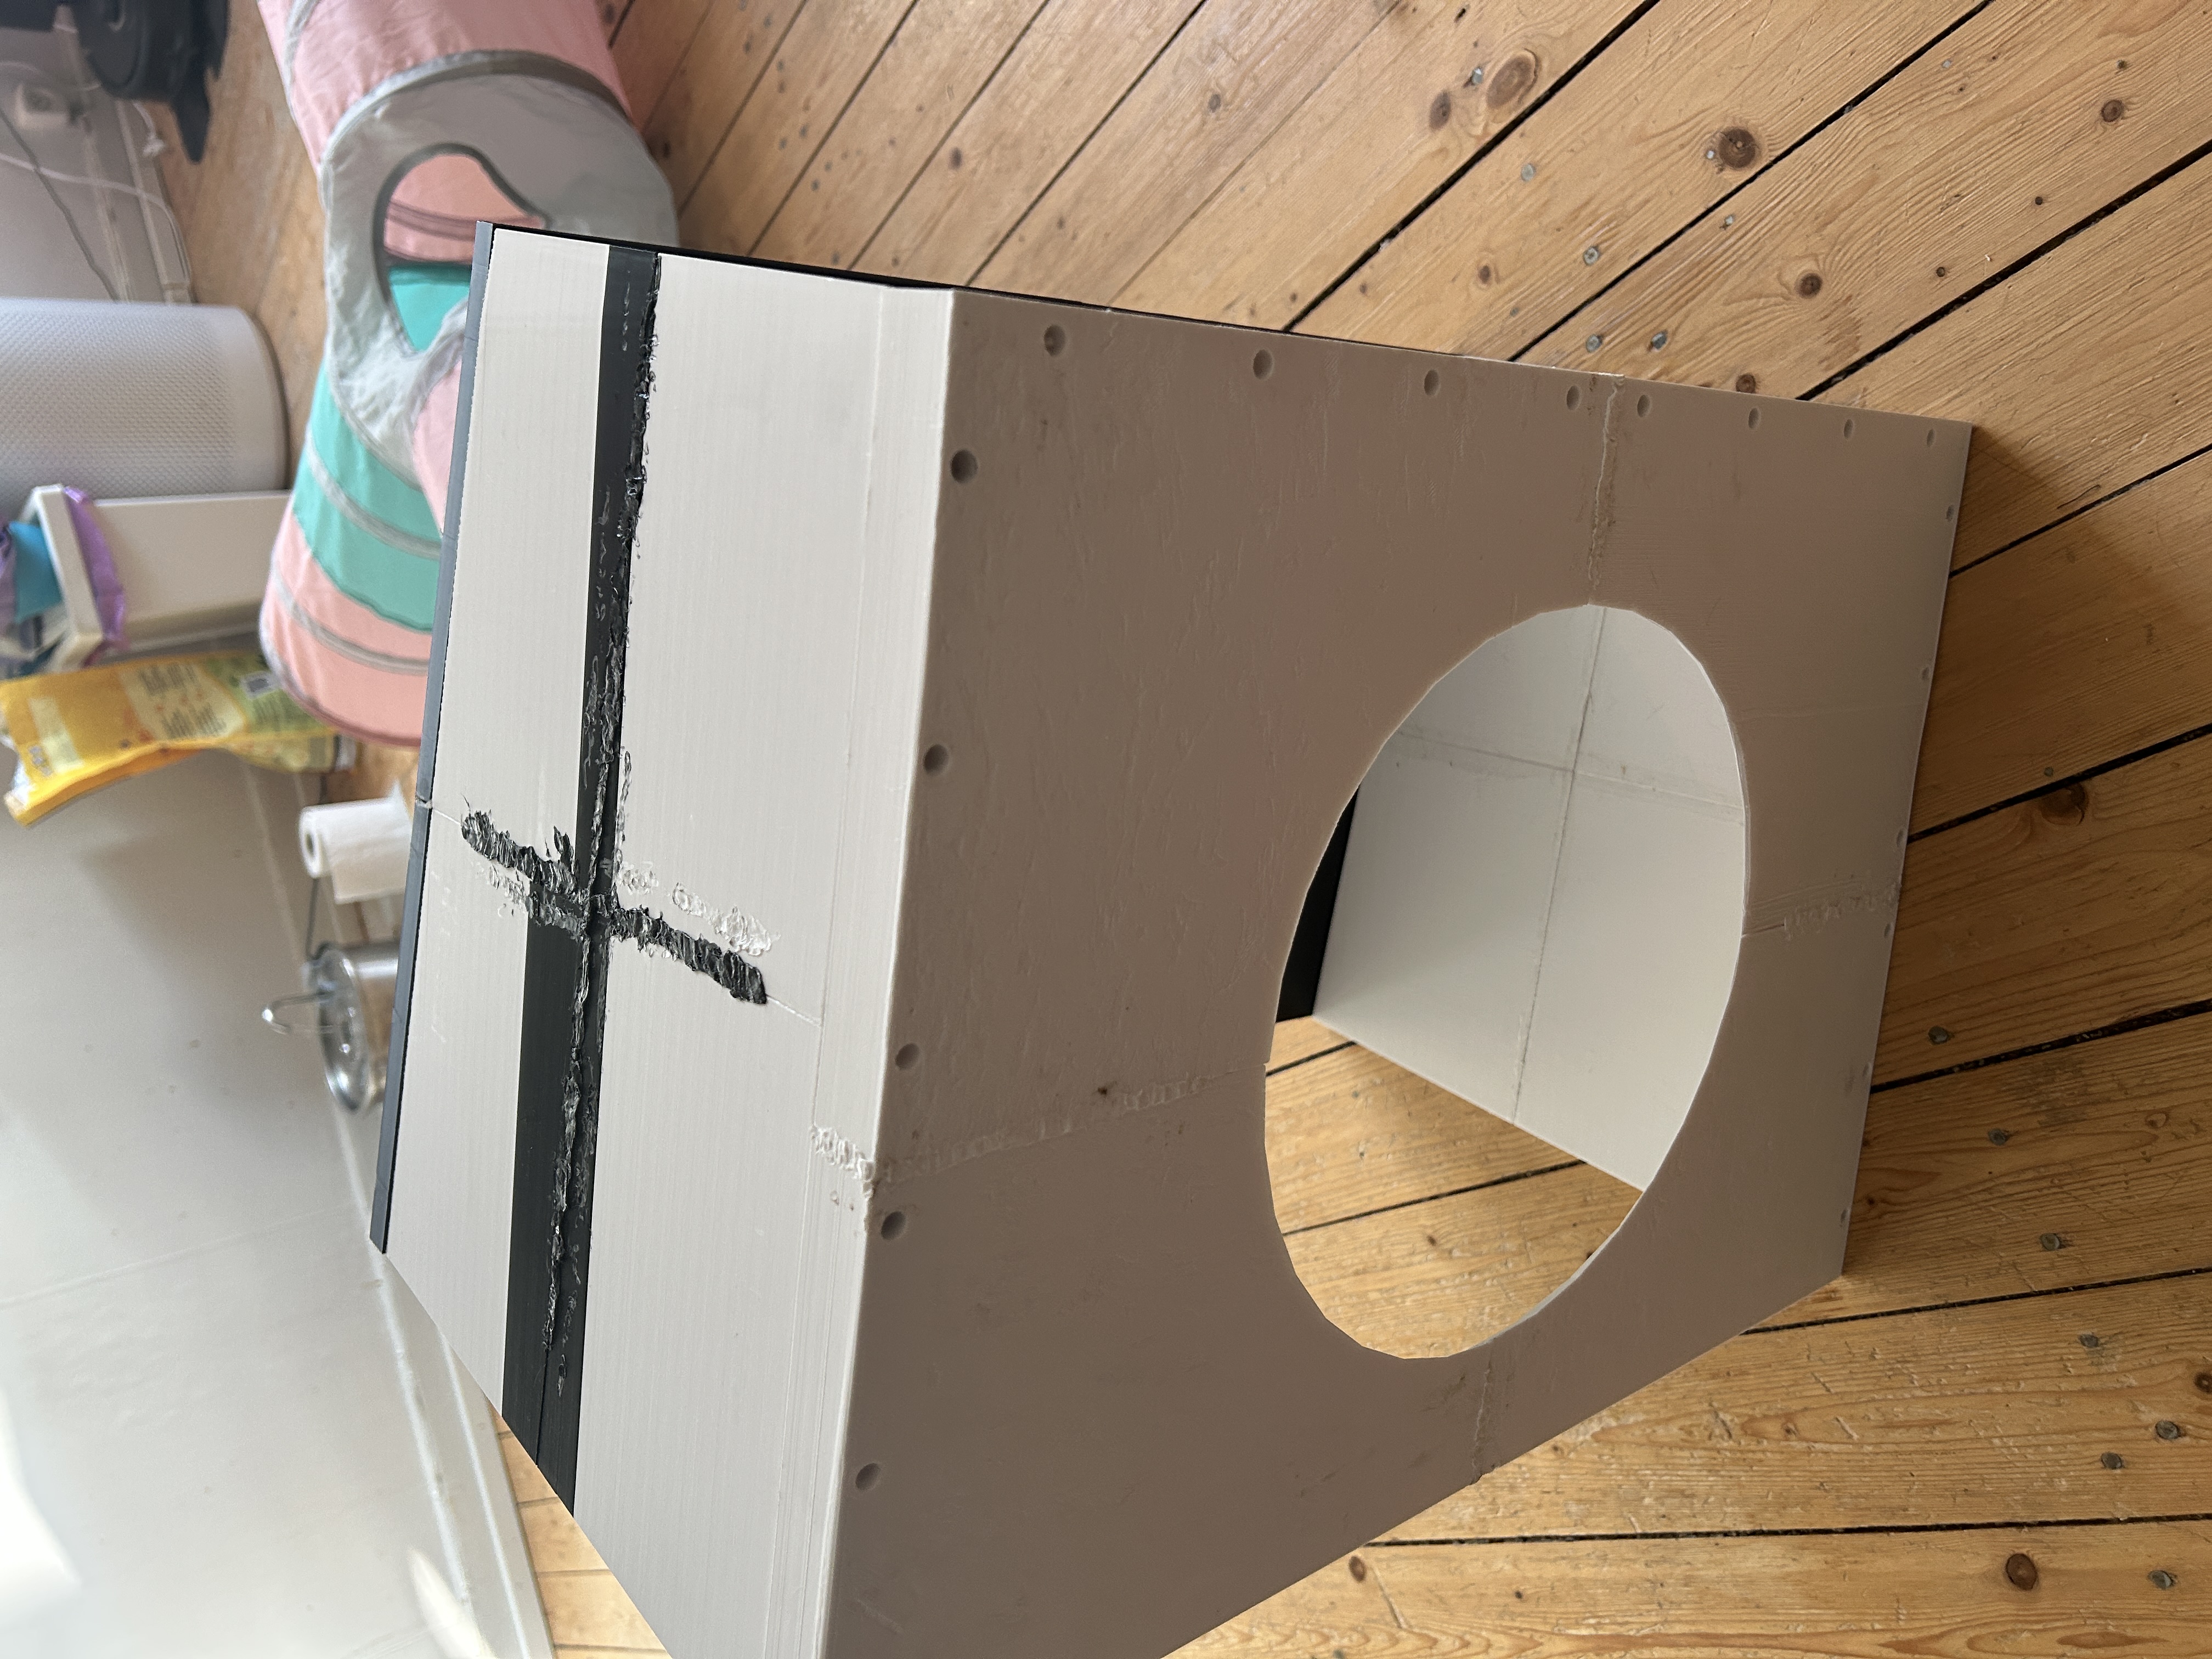
🧪 This Is Exactly Why I Wanted a Physical Prototype
The height problem is annoying, but this is exactly what a prototype is supposed to reveal.
If I had continued working only in 3ds Max, I could probably have spent a lot more time adding details before noticing that the basic internal height did not feel right.
Now I know.
And I know before finishing everything else around it.
The rough welded seams tell the same story.
This version is not supposed to be pretty.
It is there so I can assemble the real object, look at it, touch it and discover which parts of my assumptions were wrong.
This time the big discovery is simple:
the cats need more headroom.
🧱 The Plastic Welding Technique Was Worth Trying
Even with the roof problem, I am happy with how the actual assembly went.
Joining these large sections was something I had been thinking about for a while.
Using only super glue would have been easy, but I did not really trust that for all of the larger joints.
Melting the plastic together takes longer and definitely leaves a much rougher surface, but the parts now feel much more like one structure.
The ugly seams are also something I can improve later.
Right now they are useful because I can clearly see where I have joined the individual prints and how the technique behaved.
For the first attempt, that is enough.
🚧 Where the Inner Box Stands Right Now
The inner box has gone from separate printed panels to a complete physical prototype.
At the moment:
- All major inner-box sections printed
- Floor assembled
- Side walls assembled
- Front section assembled
- Large printed sections joined with super glue
- Plastic joints melted together for additional strength
- Complete inner box assembled
- Internal space checked physically
- Discovered that the current top is too low
- Decide how to create enough standing height for the cats
- Decide whether to modify the original outer box
- Decide whether to create a dome-shaped upper section
That last decision is where the design currently stands.
I have not decided which solution I am going with yet.
And I am not going to pretend I have.
🐾 More Space Above the Cats
Seeing the entire box assembled has changed how I look at this part of the design.
Before printing it, most of my attention was on whether all the pieces would fit together.
Now they do.
The next question is whether the space itself is right.
And at the moment, it is not.
The good part is that I finally have something physical enough to make that judgement properly.
I can see how much floor space there is.
I can see where the walls end.
I can see exactly how low the current roof would sit.
So now I need to rethink the upper section.
Either the original box needs to become taller along one side, or this inner box needs a new dome-shaped top that gives the cats the space to stand normally.
I may even end up printing a dome specifically for the box I have already assembled.
For now, I am leaving both possibilities open.
The important thing is that the complete inner box exists now.
And it has already done what a prototype should do:
show me the next problem before I build around it.
Comments
Comments
Loading comments…